Assign Certificates Again to Expo Build
Introduction
Distributing (or publishing) the Expo React Native app to stores is always a critical and painful process in the development application.
In this article, I would like to guide you through the whole process of publishing the Expo app, from the starting time to the moment you can download information technology from the store.
I will show you:
- how to build standalone apps,
- what are the requirements and app signings
- and other important things which volition make the publishing procedure easier.
In this tutorial, we are going to employ Expo for both building and publishing the app.
Requirements
First of all, you will need developer accounts.
An Apple tree Developer account is needed to build an iOS standalone app, and to publish it to the stores.
In case of Android, It looks a bit different. Yous need a developer account only to submit an app to the store, and it is not required to build information technology.
Developers accounts:
- iOS – build and publish app
- Android – publish app
To build apps we need expo-cli. So if you haven't installed it still – get and exercise information technology at present!
Build app – managed workflow
The showtime pace before publishing the Expo app is adding the build information to the app.json file.
The required items are: name, icon and version. You as well have to add a bundle identifier and build number for iOS and parcel proper name and version lawmaking for android apps.
The Expo team suggests adding also slug – it represents a piece of url for our app. You can add more data to app.json (similar release channels) just depict only the ones required.
Example:
{ "expo": { "name": "test-publish-app", "slug": "test-publish-app", "version": "1.0.0", "orientation": "portrait", "icon": "./assets/icon.png", "splash": { "prototype": "./assets/splassh.png", "resizeMode": "contain", "backgroundColor": "#ffffff" }, "updates": { "fallbackToCacheTimeout": 0 }, "assetBundlePatterns": ["**/*"], "ios": { "supportsTablet": true, "bundleIdentifier": "com.pagepro.testpublishapp", "buildNumber": "1.0.0" }, "android": { "adaptiveIcon": { "foregroundImage": "./assets/adaptive-icon.png", "backgroundColor": "#FFFFFF" }, "package": "com.pagepro.testpublishapp", "versionCode": 1 }, "spider web": { "favicon": "./assets/favicon.png" } } } Build app
If you have filled things correctly in the app.json, the side by side step in publishing the Expo app is triggering the build application by running expo-cli.
Run expo build to build apps for both environments or specify 1 by adding Android, iOS platform.
expo build //build app for both platforms expo build:android //build app for android expo build:ios //build app for ios Building app – Android
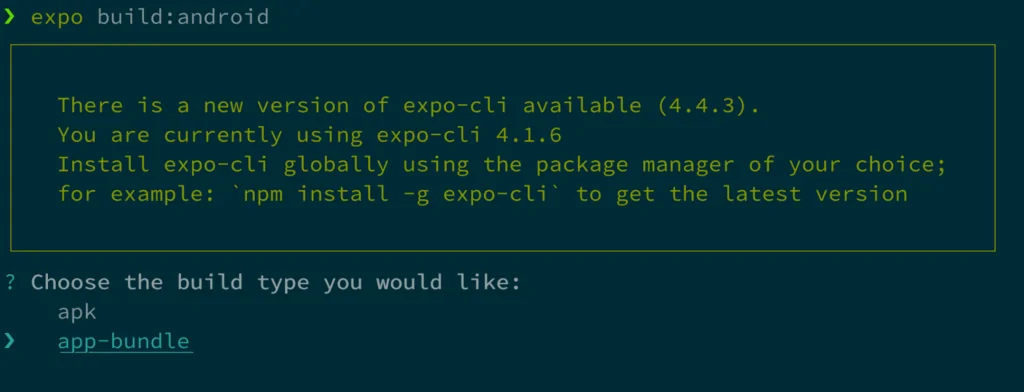
If y'all are building an app for android, you accept ii options – build APK or Android App Package.
I recommend using the 2nd pick, just make sure Google Play App Signing is enabled for edifice projects.
Google Play App Signing
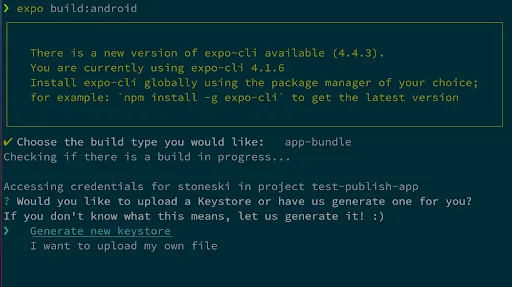
When you build the awarding for the offset time, yous will be asked whether you lot upload a keystore file or take the Expo team handle information technology for you.
No matter what pick you lot choose, backup that keystore to a rubber location.
If you want to update the application in future yous will need that keystore – every future update to Google Play Store must be signed with that to be accepted by Google.
Build process in details
Pace 1: Run expo build:android and choose apk-bundle option:
Step two: Generate keystore file or update existing i. I don't accept any, so I let Expo create a new one:
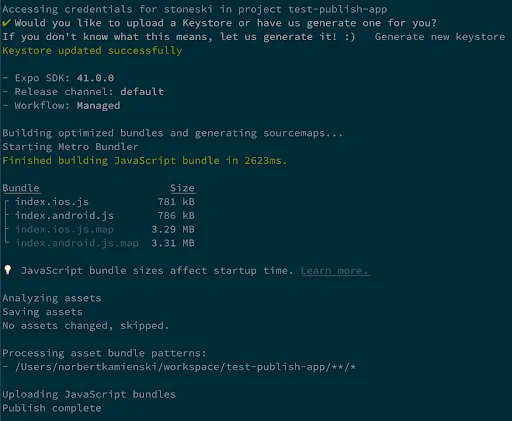
Step 3: Later on the keystore is created, information technology should run the build:
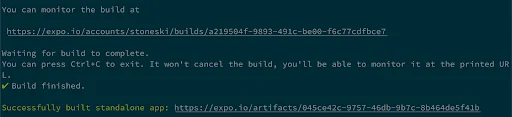
Step four: If everything goes fine, the terminal should paste an URL to the build. Get there and download an artifact. We volition need it later to put the app in shop:
Edifice app – iOS
The situation is similar to Android here.
You can build apps in two dissimilar types, like an archive or a simulator.
The starting time one allows users to publish an app to AppStore or TestFlight, and the 2nd ane is only for testing purposes on a simulator.
iOS Credentials
In example of Apple apps, they need credentials in club to be congenital and published.
Expo tin can create necessary credentials for you. All yous need to exercise is to sign in your Apple Developer account. Don't worry about passing information technology to Expo CLI, information technology is used locally and is never saved on Expo'south servers.
If you desire to create that credentials by yourself, you take to do it on Apple Programmer Portal.
App Signing – clarification of credentials
Expo can automatically sign your app for iOS and Android. If you don't want aid from the Expo squad, you have to do it by yourself. You will have some requirements that you must exercise if you want to button your application to the shop.
iOS
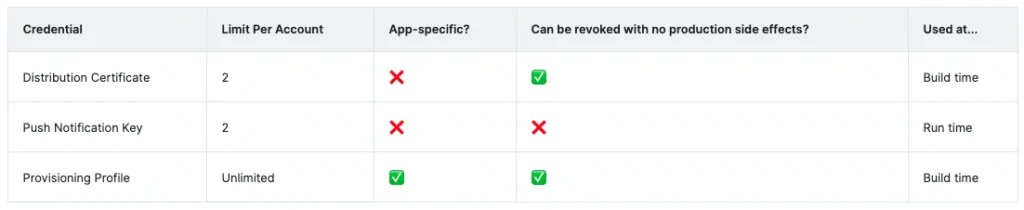
There are 3 required credentials you have to do past Apple Developer account:
- Distribution Certificate – this is a document that tells everything about a programmer. You may simply have one distribution certificate associated with your Apple Developer account. This certificate will be used for all of your apps. If that document expired yous cannot update your apps anymore.
- Provisioning Profile – this is a certificate which is app-specific (each certificate for every app). That certificate is associated with the distribution certificate. If the distribution certificate expires – y'all have to renew provisioning as well. Provisioning profiles expire after 12 months.
- Push Notification Keys – that keys are related with button notifications, and information technology'due south required by Expo. The reason is you can after enable push notification in the app by OTA updates, rather than submit it past shop.
Summary in details
Articulate Credentials
You can remove your credentials by running remove commands – expo build:ios –clear-credentials – this only removes credentials from Expo'south servers, information technology does not delete the credentials from Apple's perspective. To remove information technology successfully, yous accept to go to Apple Developer Console and do it manually.
Android
This is easier than on iOS env. Google requires all Android apps to be digitally signed with a document before they are installed on a device or updated.
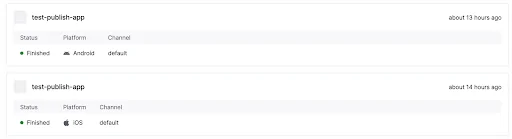
Bank check status
After running commands, Expo builds it on their servers. Of course, you tin can check the progress status and runway build logs on the portal or by running expo build:status.
When build is done, you volition see the url to your app file – paste it to the browser immediately and download the parcel of apps.
Build procedure in details
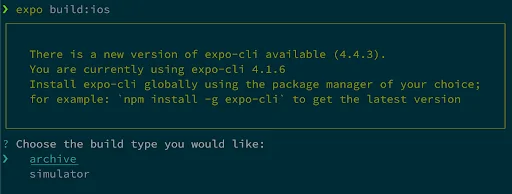
Step i: Run expo build:iOS and choose archive selection:
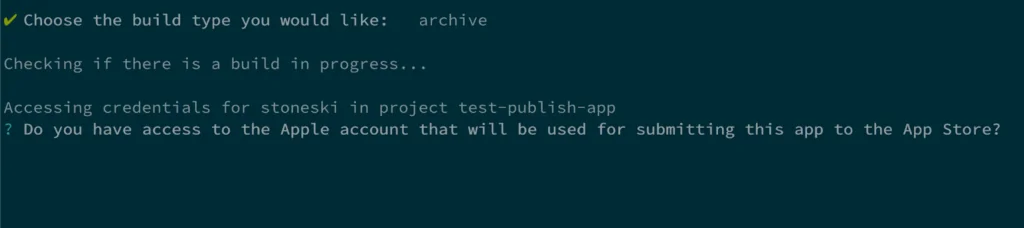
Step 2: Expo-cli asked you about sign in to Apple programmer account. Pass credentials and log in:
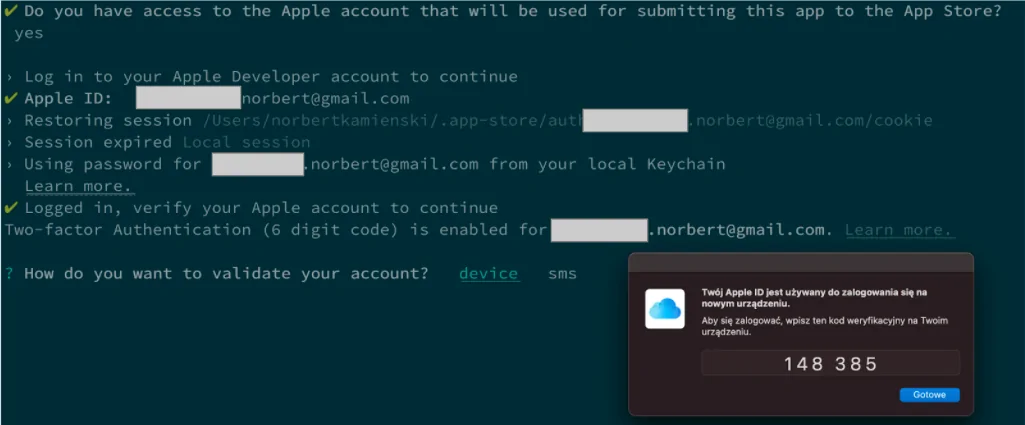
Step 3: Then y'all need to verify your Apple account:
Step iv: If you successfully log in, you need to select a squad:

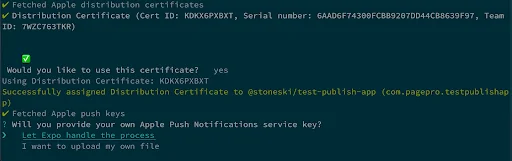
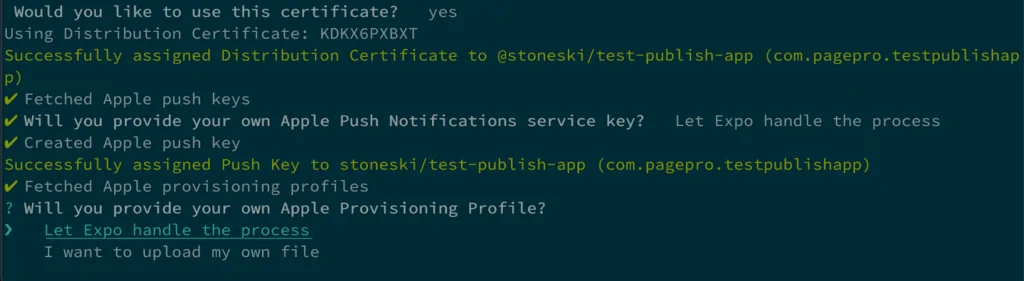
Step 5: Creating iOS Certificates.
You tin can do information technology past yourself on Apple tree Developer Account or permit Expo do that. I chose a second option.
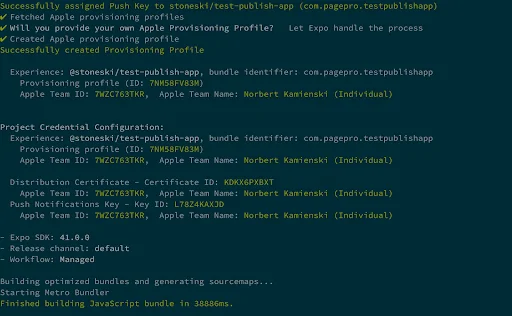
Step 6: After that steps, build should run:
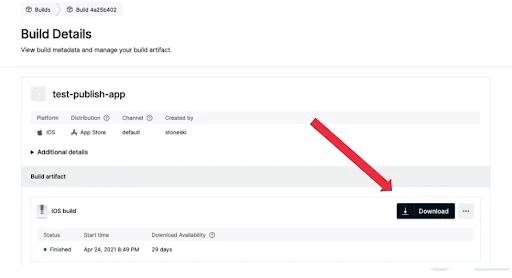
Step vii: If everything went fine, expo-cli shows a URL y'all tin can download an archive, practice that – we will need it to next publish steps:

Best practices virtually Deploying App to Stores
If you want to ensure your app satisfies the assumptions and will be accepted to the Apple and Google shops, endeavour to take care of some of these:
- add a splash screen, the first thing users see afterwards he runs an app,
- preload and enshroud assets so app loads quickly,
- define right status bar to work correct with your UI,
- use native gestures whenever possible,
- add together a neat icon that pass environs requirements,
- make sure your app got valid identifiers,
- make sure your app has got valid versioning,
- adding privacy policy,
- pass iOS specific guidelines [link].
Deploying to App Stores
This is the terminal step of publishing – putting applications into stores.
That will aid you upload your standalone apps to Apple tree TestFlight or Google Play. Equally I mentioned earlier, y'all volition need developer accounts for this. So if yous don't have them however, yous need to get to Apple Developer and Google Play Developer site to purchase them.
The starting time upload is required to practice manually for both Apple and Android. I will testify that process later.
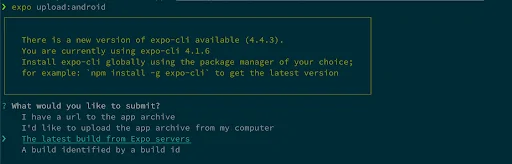
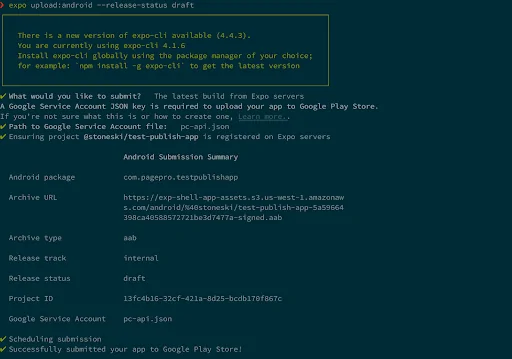
Next fourth dimension we upload an app to stores, nosotros volition utilize an expo CLI and these commands:
expo upload:android // submit android app expo upload:ios // submit iOS app Condition on 24.04.2021:
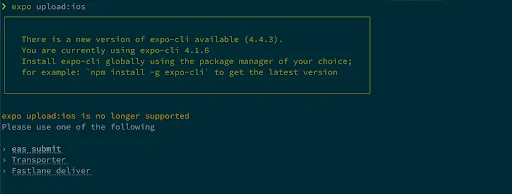
Control expo upload:ios are not bachelor anymore. Expo team recommended utilise:
Transporter, EAS Submit, Fastlane Deliver

EAS Submit is still a premium selection, and you need to pay for Expo Premium Account to employ information technology.
So the free choice for iOS is manually put via Transporter or XCode.
Deploy in details – Android
For the start fourth dimension, you have to upload an application manually. I volition show a short guide explaining that procedure.
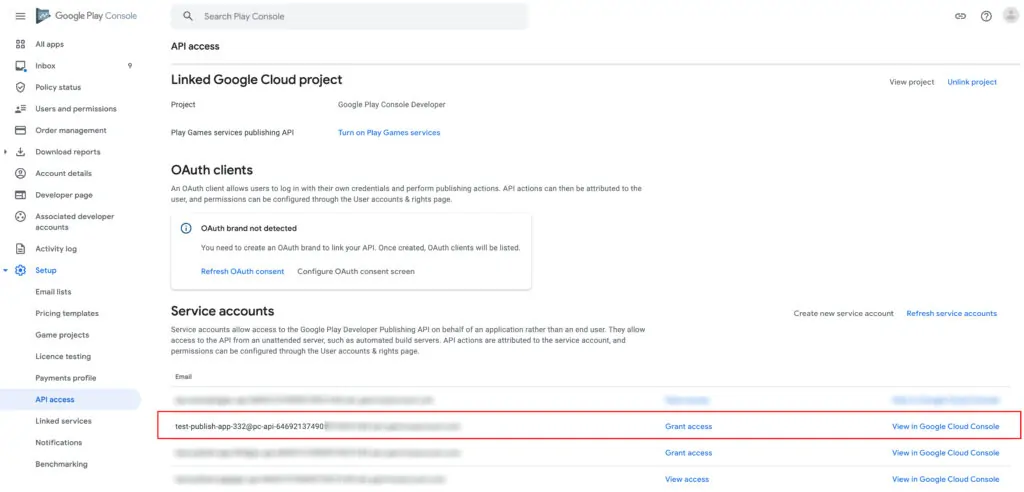
Setup Google Store
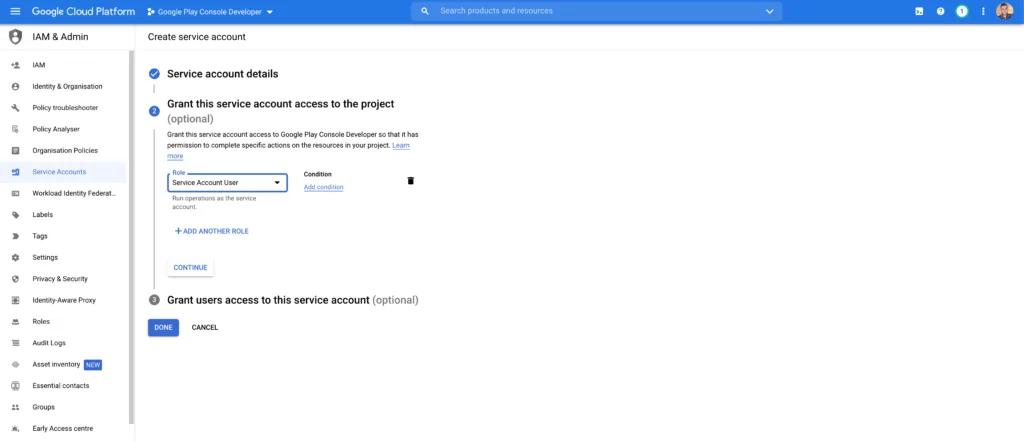
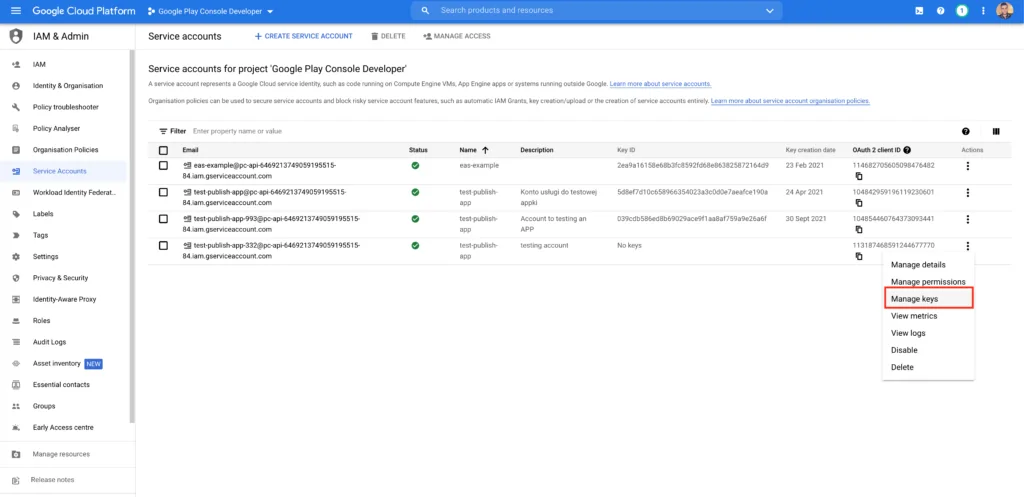
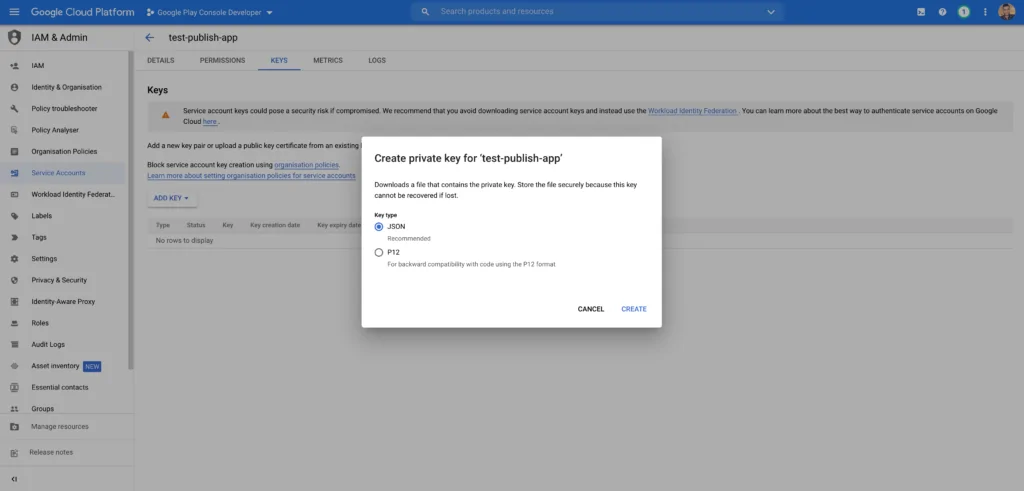
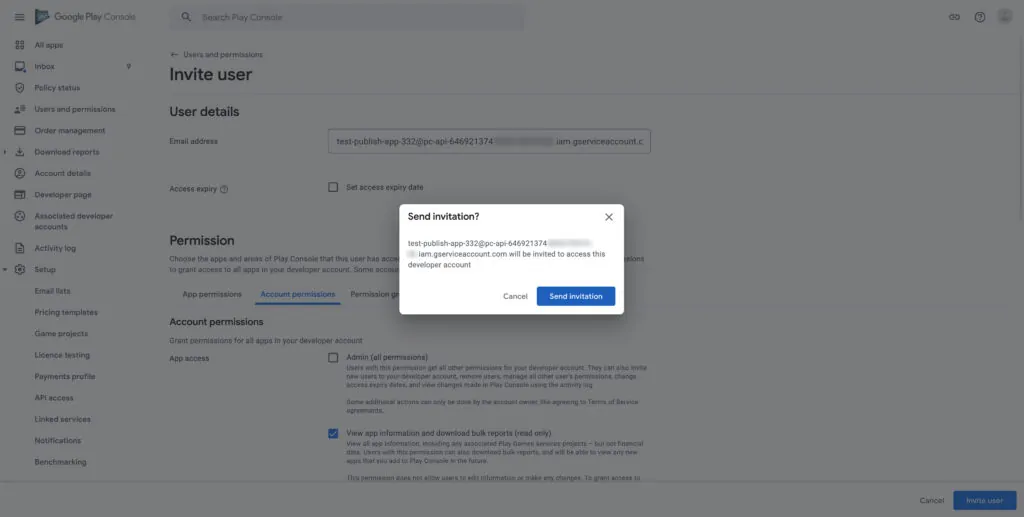
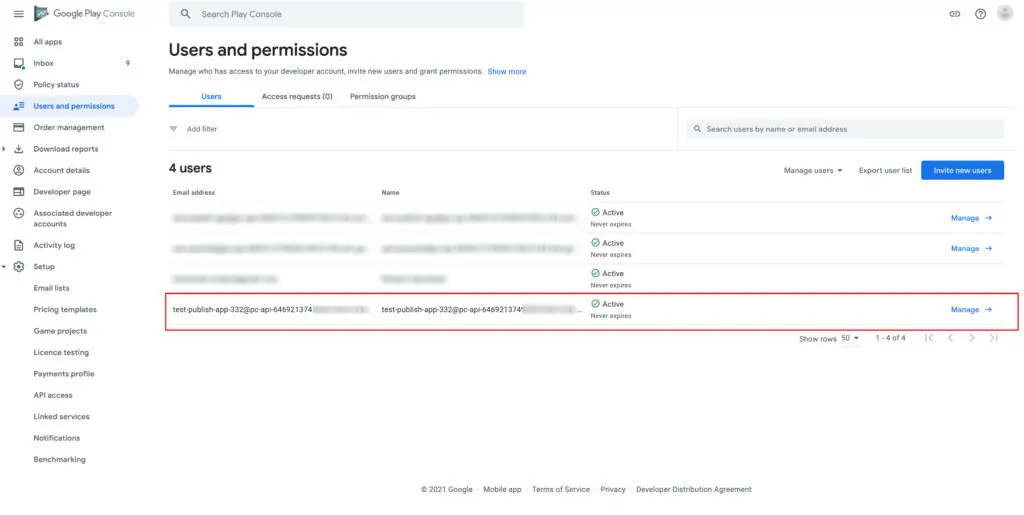
Step ane: Go to Google Play Console and create a new account to go access to API interface.
If you'd like to submit your Android app to Google Play Store with expo upload:android or eas submit, you lot need to exercise this:

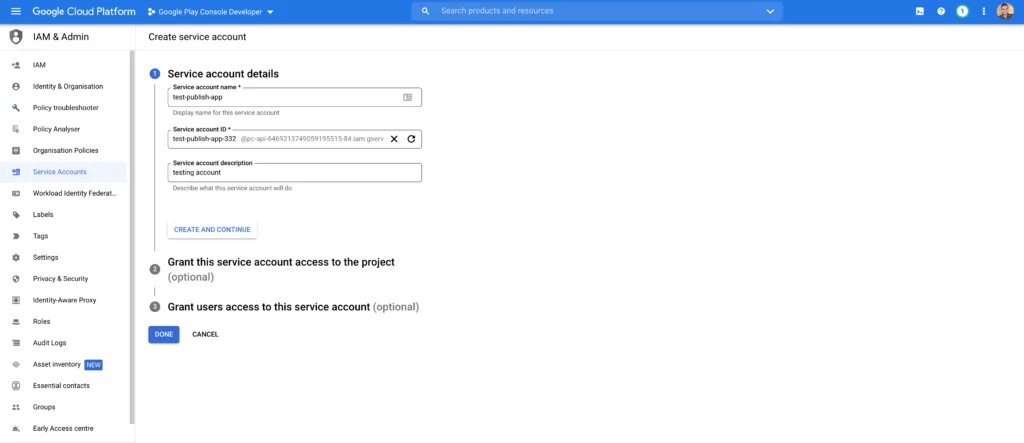
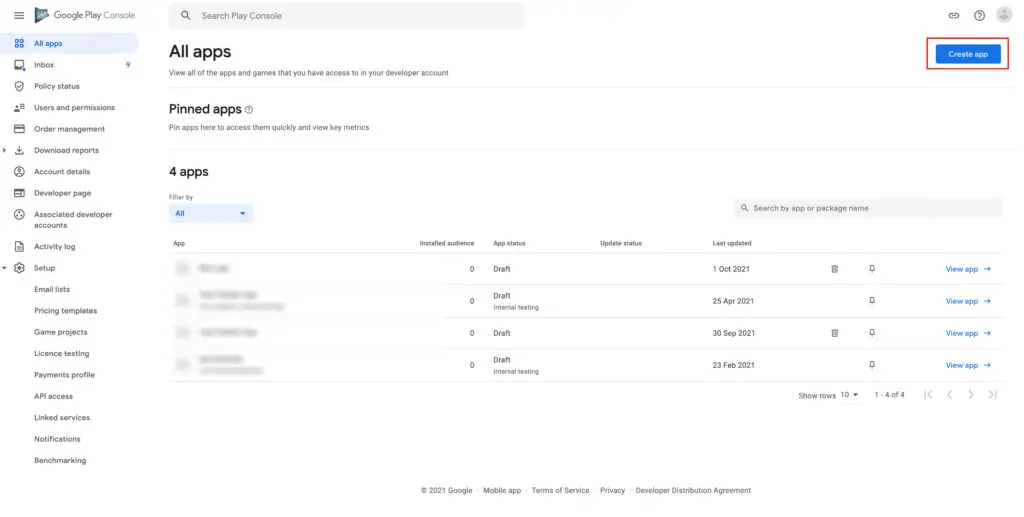
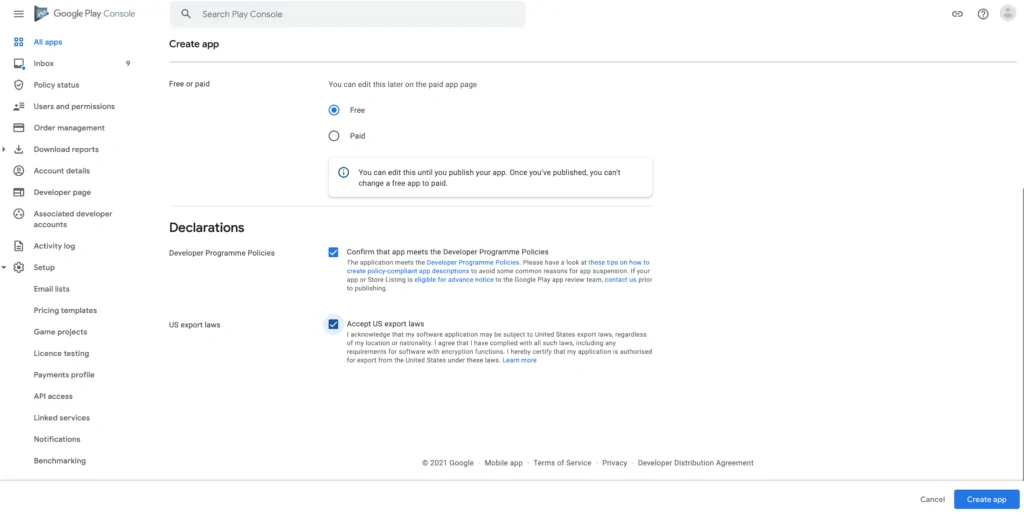
Step 2: Create a new awarding.
The start app upload needs to be washed manually.


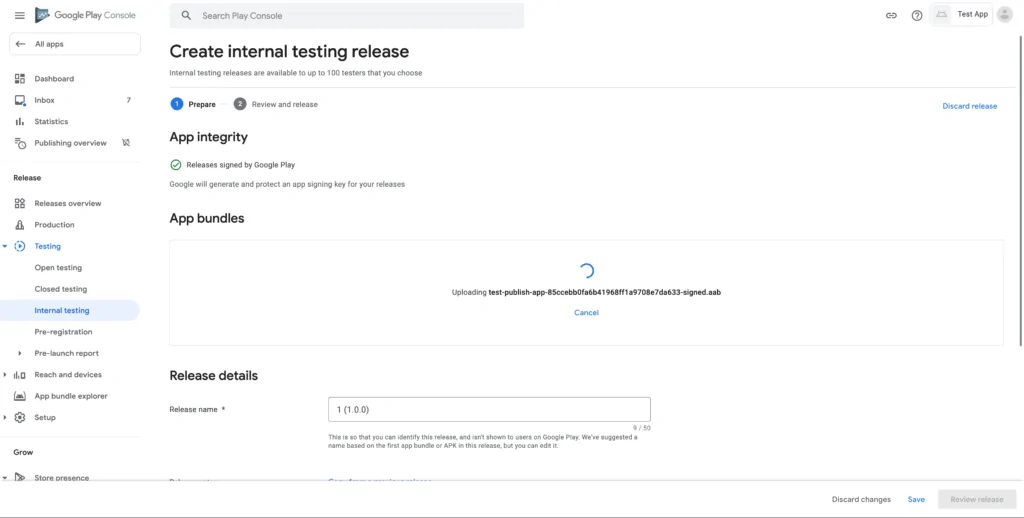
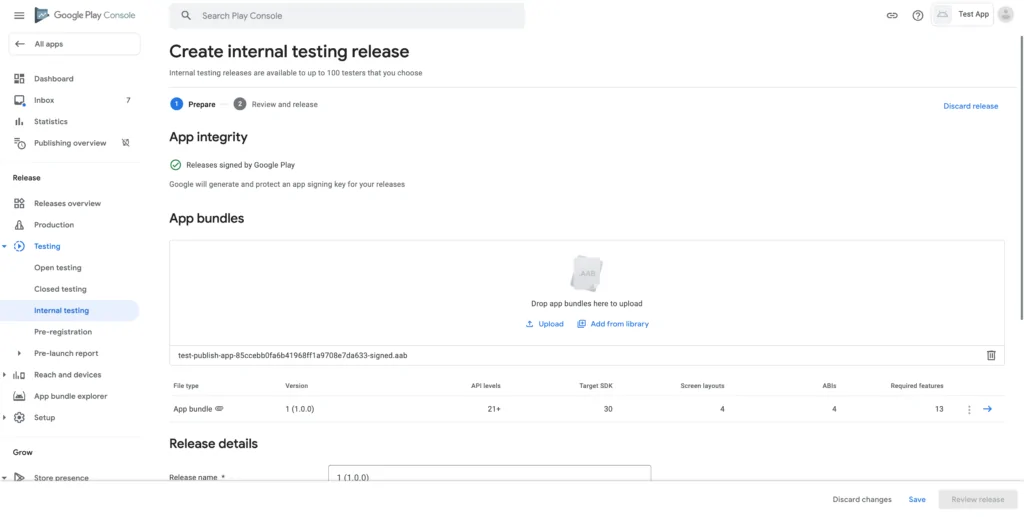
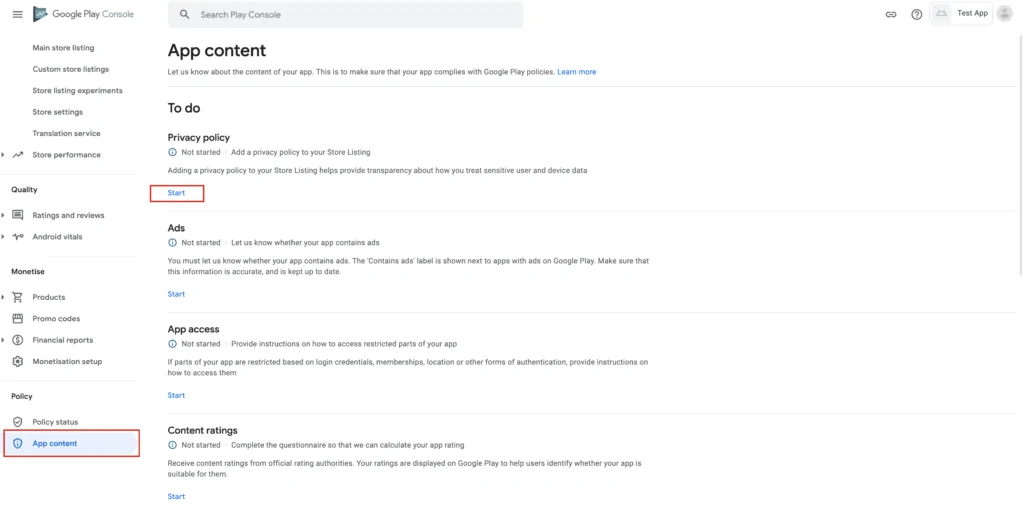
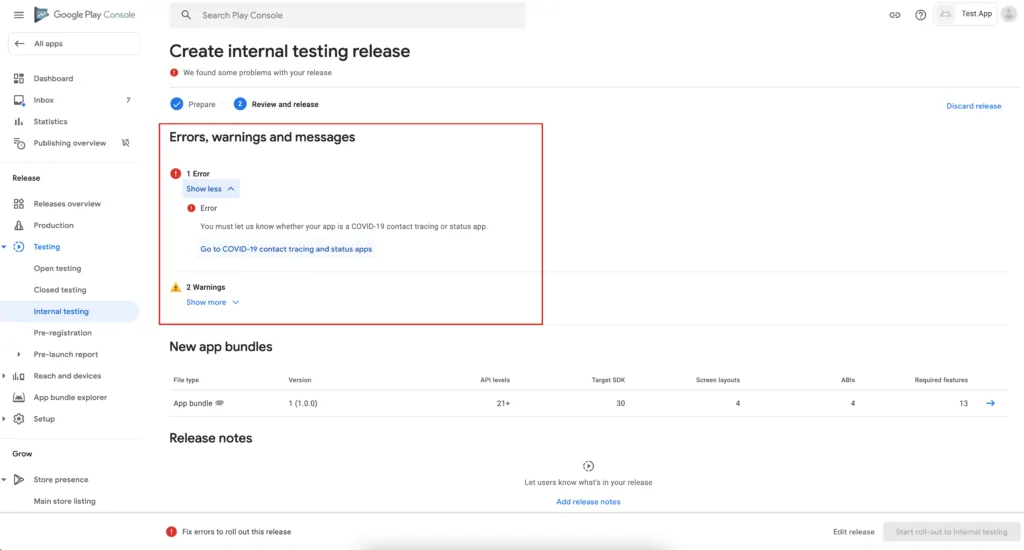
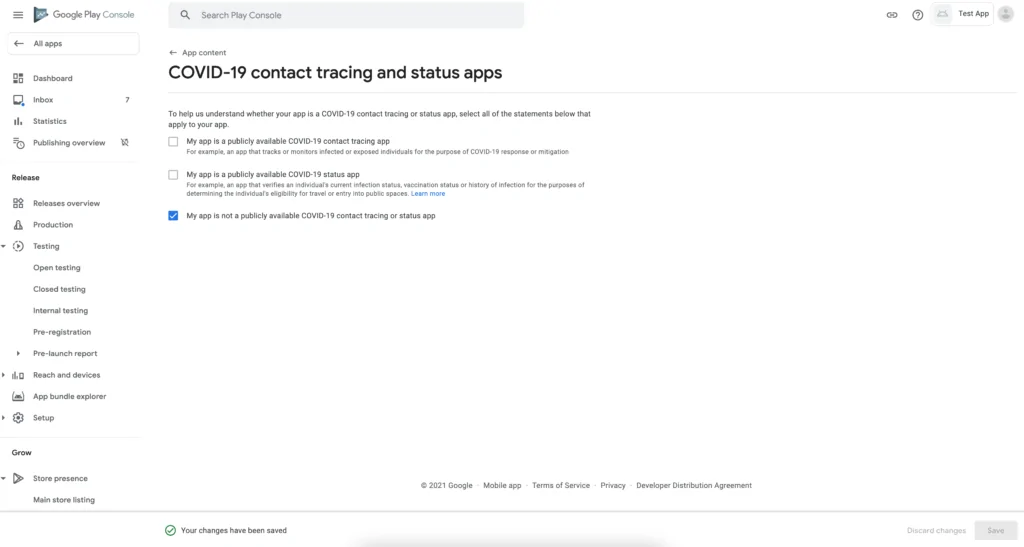
Stride 3: Later on submitting the test version, you should probably get an mistake.
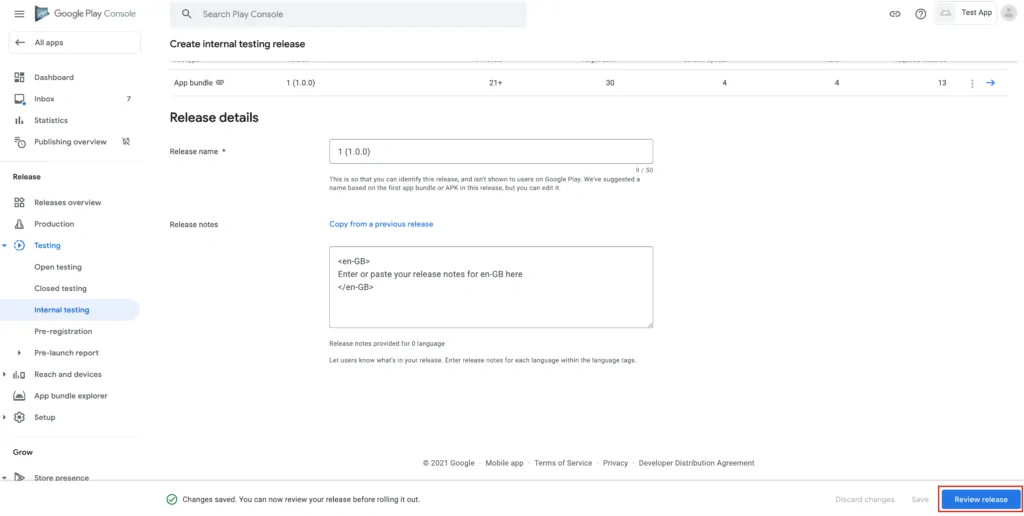
Y'all need to go to rules and pass a URL to the privacy policy.
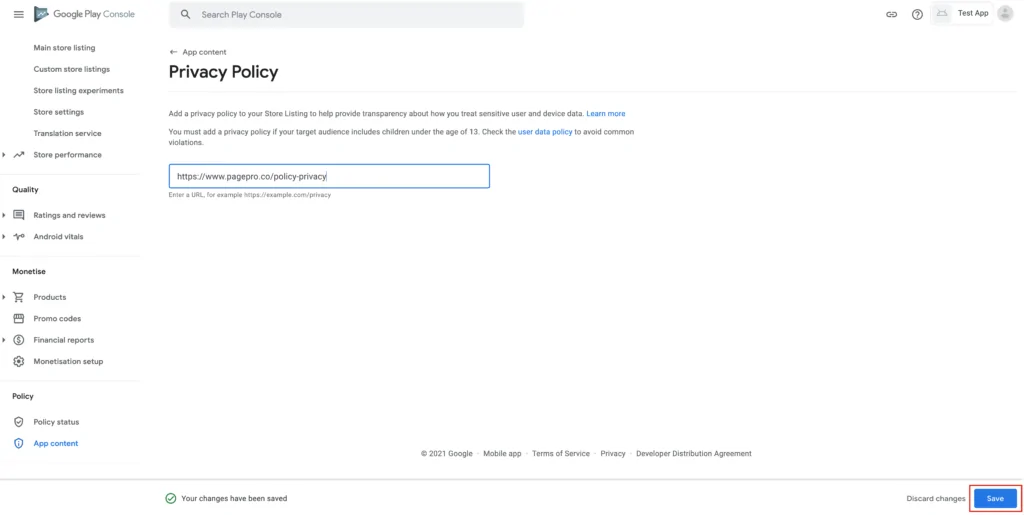
Pace 4: When you come back to the application tab, errors should disappear, and now you tin can submit the app.
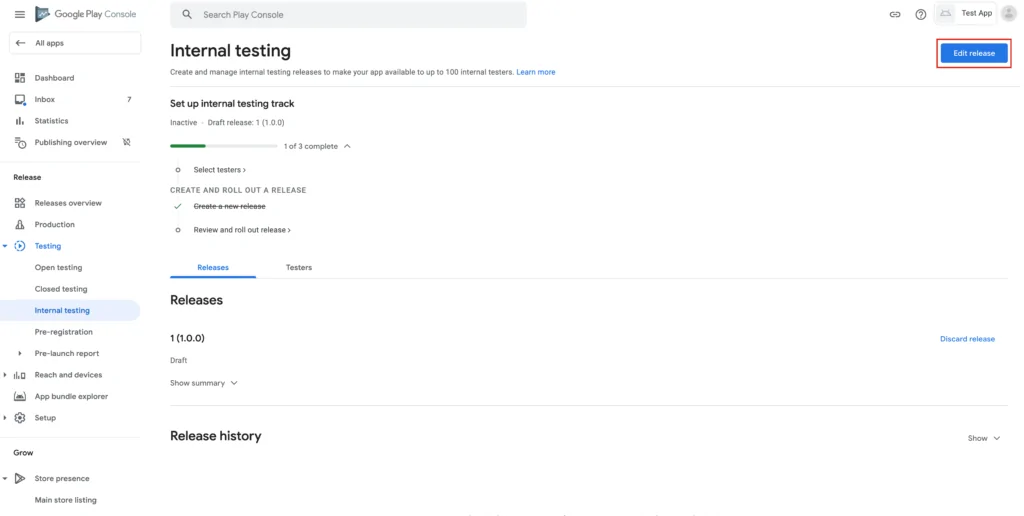

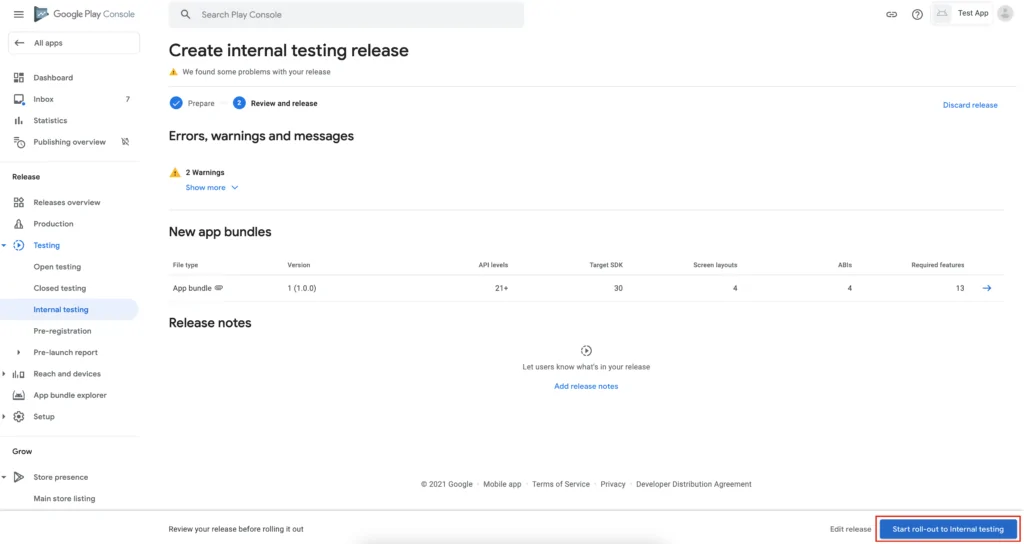
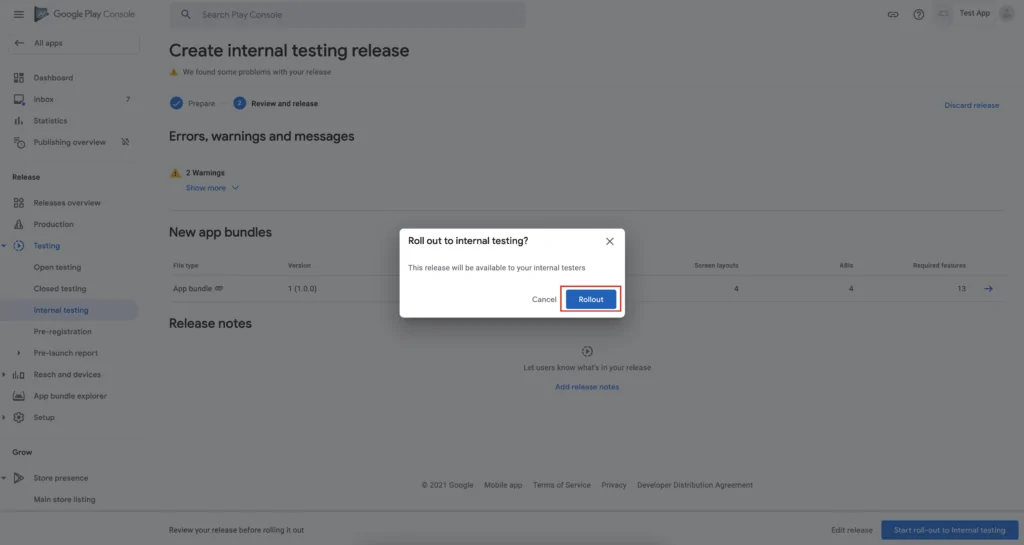
Footstep 5: After submission, you have to add testers which accept got access to download and use the app.
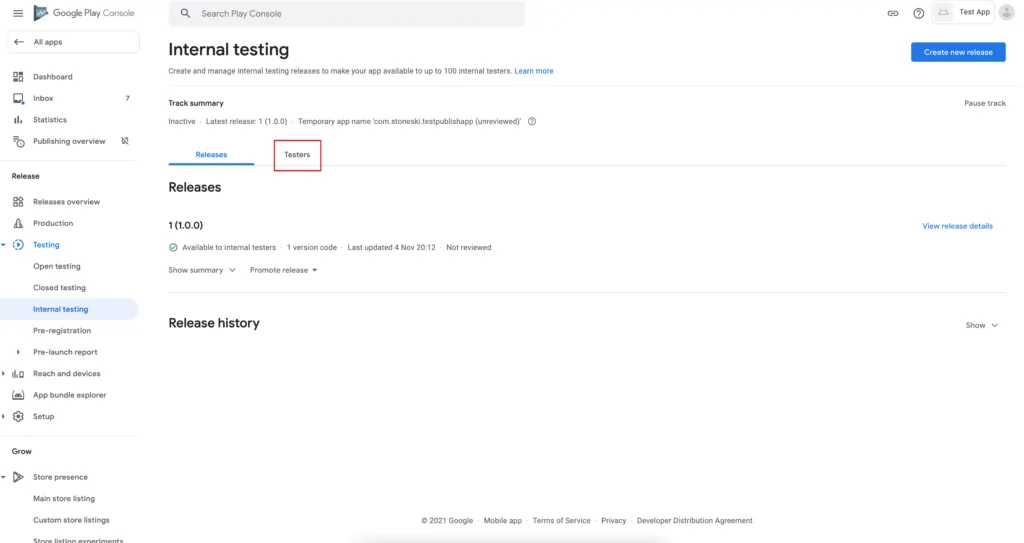
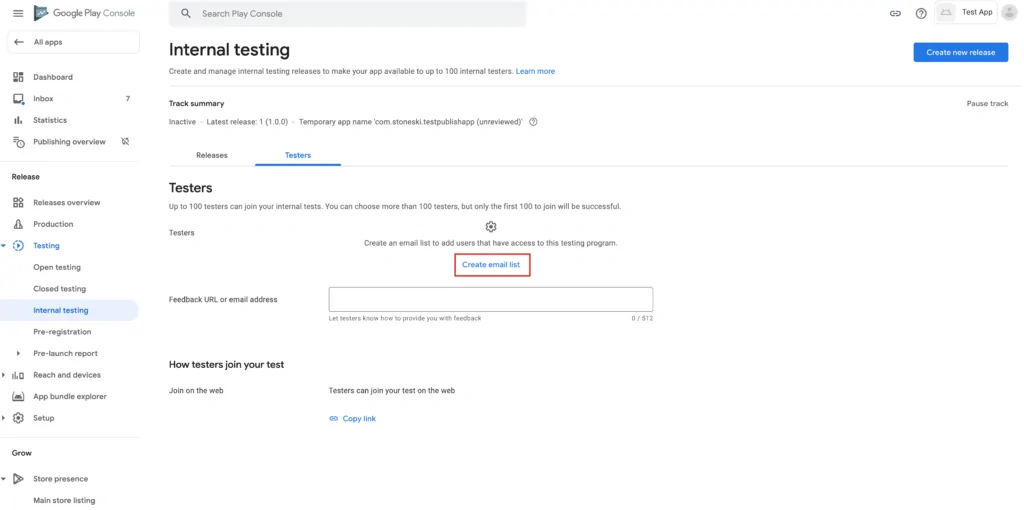
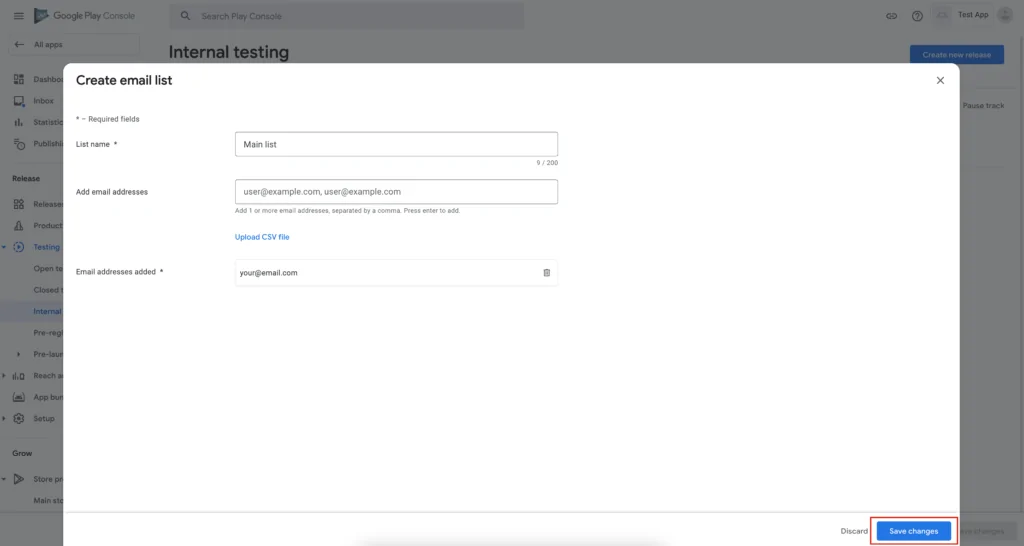
Step 6: Subsequently that, y'all should get admission to the test application via the store.
Next time, you tin can upload and update the app using expo-cli.
Deploy in details – iOS
You lot can build an iOS app only on macOS. So if you want to upload an iOS app to the App Store, you will need to have a macOS device or use a virtual machine and install OSX on it.
Here the situation is so dissimilar than with Android. First, y'all don't have to practice the kickoff upload manually. You can use expo-cli. In fact, yous can use expo CLI correct away by running expo upload:ios. In that case, you need ii required flags with commands:
--apple-id - your Apple ID login
--apple-id-countersign - your Apple ID password.
After running that command, if everything went well, it should publish this application to TestFlight.
Setup Apple tree Connect
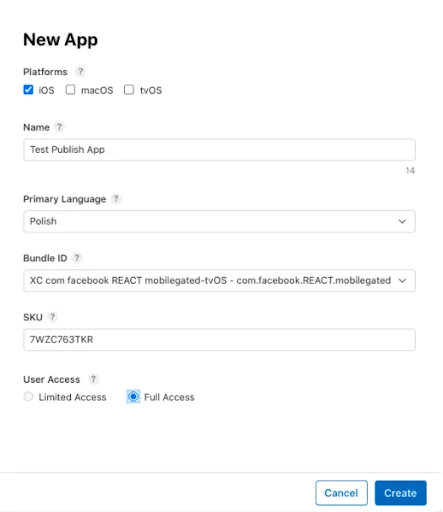
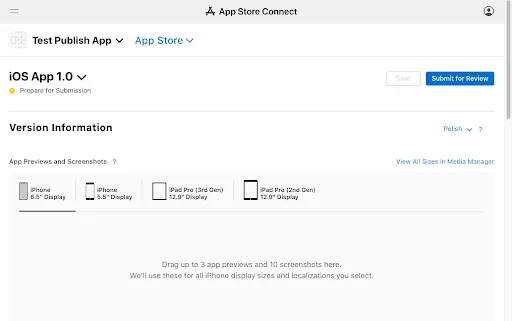
Pace i: Go to Apple Store Connect and create an application.
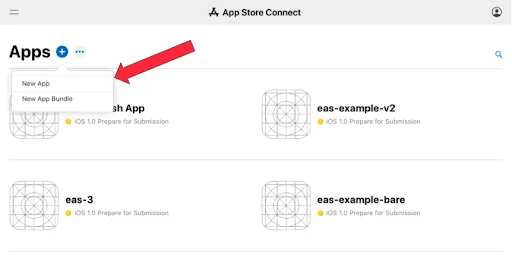
Step 2: Fill in the details about the application.
Ready a parcel ID that you lot filled in app.json.
Stride three: Download artifact from Expo servers, you volition send to connect.
Footstep iv: To put our app manually to TestFlight, nosotros will need to use a Transporter application (available on the AppStore).
Manually upload instructions:
- Sign in into iTunes connect with your Apple tree ID and accept terms.
- Sign in to the Transporter app (apply Apple ID).
- Add the IPA file with application to the Transporter.
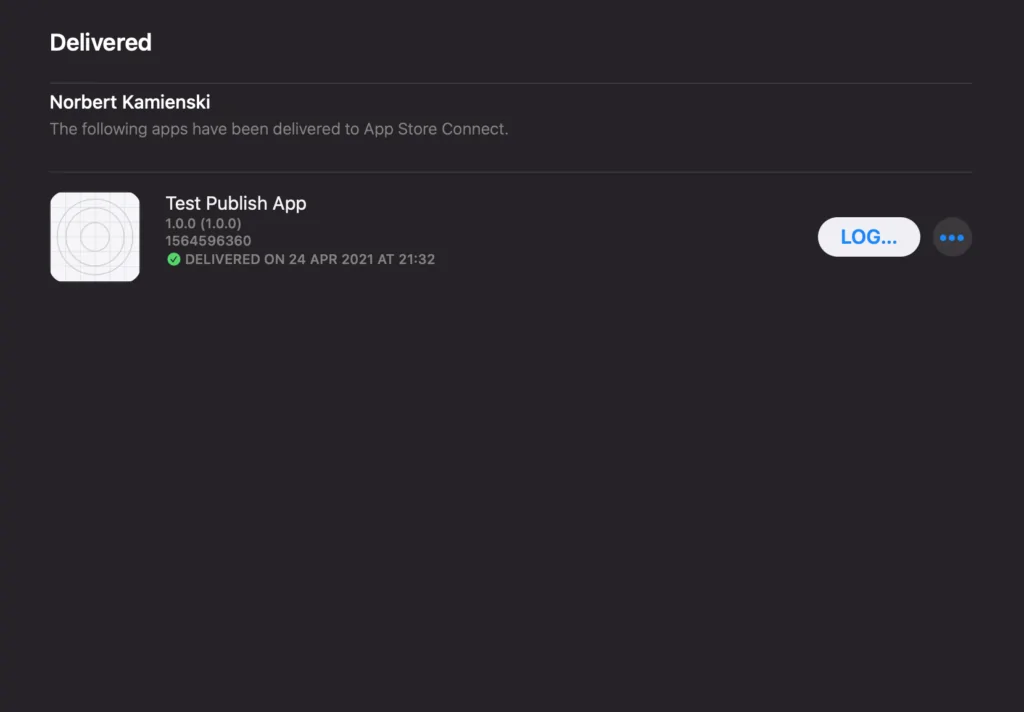
- Submit the app by clicking the Deliver button.
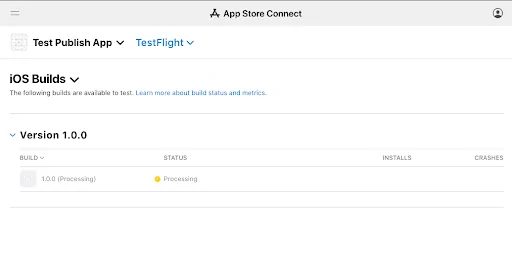
This process tin accept a few minutes. Afterwards this process is complete, you can check the status of a submission to TestFlight in App Store Connect.
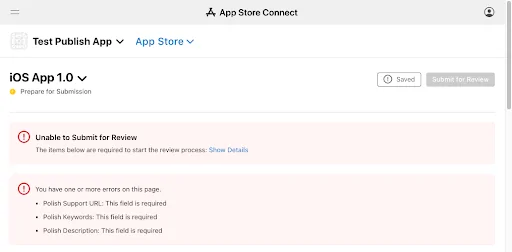
Footstep 5: After sending it via the Transporter app, yous accept to become back to the Apple Connect Store and submit that awarding.
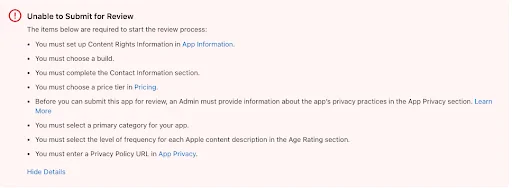
Footstep 6: If you clicked the submit button, probably you take got some errors.
Don't worry, information technology is normal. You lot have to refill information about the privacy policy.
Stride 7: The last footstep is to wait for the application to exist approved and add together it to the TestFlight.
Conclusion
The process of building and publishing React Native apps to the stores isn't easy, and yous need some noesis of so that.
I promise this article will assistance yous go through that horrible function of the development procedure 🙂
The procedure describes publishing an expo app, which is a bit simplified due to the possibility of expo-cli.
But these are as well some parts like setting up stores, uploading the app manually, or describing what certificates mean.
Source: https://pagepro.co/blog/publishing-expo-react-native-app-to-ios-and-android/
0 Response to "Assign Certificates Again to Expo Build"
Post a Comment